A simple step-by-step guide to making your own night guard for a perfect fit
If your dental impression isn’t accurate, nothing will fit properly—whether it’s a night guard, denture, or any custom dental appliance.
This is exactly why many boil-and-bite products feel loose or uncomfortable, while professionally made ones fit securely and naturally.
The difference comes down to one thing:
the quality of your dental impression.
The good news? You don’t need a clinic to get it right. With the right approach, you can take a highly accurate dental impression at home—one that’s good enough for a truly custom fit.
Why dental impressions fail (and how to avoid it)
Before jumping into the steps, it helps to understand where most people go wrong.
The most common issues are:
- Using the wrong tray size
- Not mixing the impression material evenly
- Biting too hard (or not enough)
- Moving the tray before the material fully sets
Any one of these can lead to a distorted impression—and that usually means a poor fit later.
Fix these, and you’re already ahead of most first-time users.
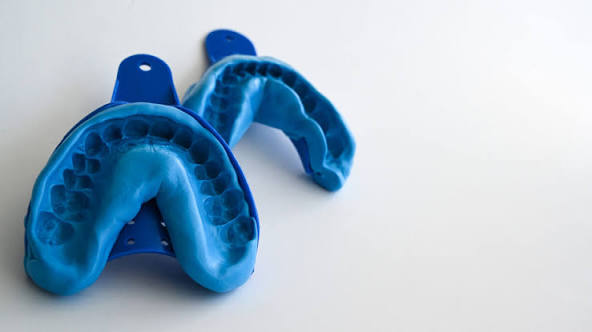
Step 1: Choose the right impression tray
Start by selecting the correct tray for your upper or lower teeth. Trays usually come in small, medium, and large.
Before adding any material, place the empty tray in your mouth and check the fit.
A good tray should:
- Cover all your teeth completely
- Sit comfortably without pressing into your gums
If the tray is too small or too tight, the final impression won’t be accurate—no matter how well you do the rest.
Step 2: Clean your mouth and hands
This step is simple, but easy to overlook.
- Wash your hands thoroughly
- Brush your teeth and rinse your mouth
Make sure there’s no food debris left. Even small particles can affect the surface detail of your impression.
You can use bare hands—no gloves needed. Gloves can actually make it harder to properly mix the material.
Step 3: Mix the impression putty evenly
You’ll be working with two parts: usually a blue and a white putty.
Knead them together until the color becomes completely uniform—no streaks, no marbling.
- Mixing time: about 30 seconds
- Spreading into tray: 10–15 seconds
Work efficiently here. Once mixed, the material starts setting quickly.
An uneven mix is one of the top reasons dental impressions fail.
Step 4: Position and bite correctly
Place the tray into your mouth slowly, aligning it with the center of your teeth.
Make sure your teeth sit evenly in the middle of the material.
Then bite down with steady, even pressure.
- Too much force → material gets compressed or pierced
- Too little force → shallow, unclear impression
Once in place, gently hold the tray steady with your fingers.
Do not move it for at least 5 minutes.
If the material shifts before fully setting, the impression can become unusable.
Why this step matters more than you think
This is where most boil-and-bite products fall short.
They don’t capture enough detail, which is why they often feel loose or slightly off.
A properly taken impression, on the other hand, is what allows a professional-fit night guard or denture to feel secure, stable, and natural.
Step 5: A simple tip if you’re worried about getting stuck
If you have receding gums, tight teeth spacing, or you’re concerned about the impression getting stuck—
You can place a very thin layer of plastic wrap over your teeth before taking the impression.
This makes removal smoother, without noticeably affecting accuracy.
Step 6: Remove the impression the right way
When it’s time to remove the tray, don’t pull it forward by the handle.
Instead:
- Apply force from the back teeth area
- Lift it straight up (upper tray) or down (lower tray)
This helps prevent distortion and keeps the shape intact.
What a good dental impression should look like
A successful dental impression should:
- Clearly capture the full shape of each tooth
- Show clean edges along the gum line
- Have no major air bubbles or gaps
- Feel solid and fully set
If your impression looks shallow or uneven, it’s worth redoing. A better impression now saves you from a poor fit later.
Can you really make a night guard at home that fits well?
Yes—but only if the impression is done right.
This is the step that determines whether your final result feels:
- loose vs secure
- bulky vs natural
- uncomfortable vs easy to wear
A well-made impression allows you to create a custom-fit night guard at home—without the cost or wait of a dental visit.
The Bottom Line
Taking a dental impression at home isn’t complicated—but it does require a bit of care and attention.
If you follow the steps above, you’ll end up with a clean, accurate impression that sets the foundation for a proper fit.
And in the end, that’s what makes the real difference:
Not just something you can wear—
but something that actually feels like it was made for you.
Learn more practical tips for creating your own custom night guard.